Golden hour photography harnesses the warm, soft light just after sunrise or before sunset. This magical time offers a unique opportunity to create stunning images. The natural lighting flatters subjects and landscapes, enhancing their beauty.
The “golden hour” or “magic hour” typically lasts less than an hour. During this brief window, the sun’s position creates a golden glow. This enhances colors and softens shadows, making it ideal for various types of photography.
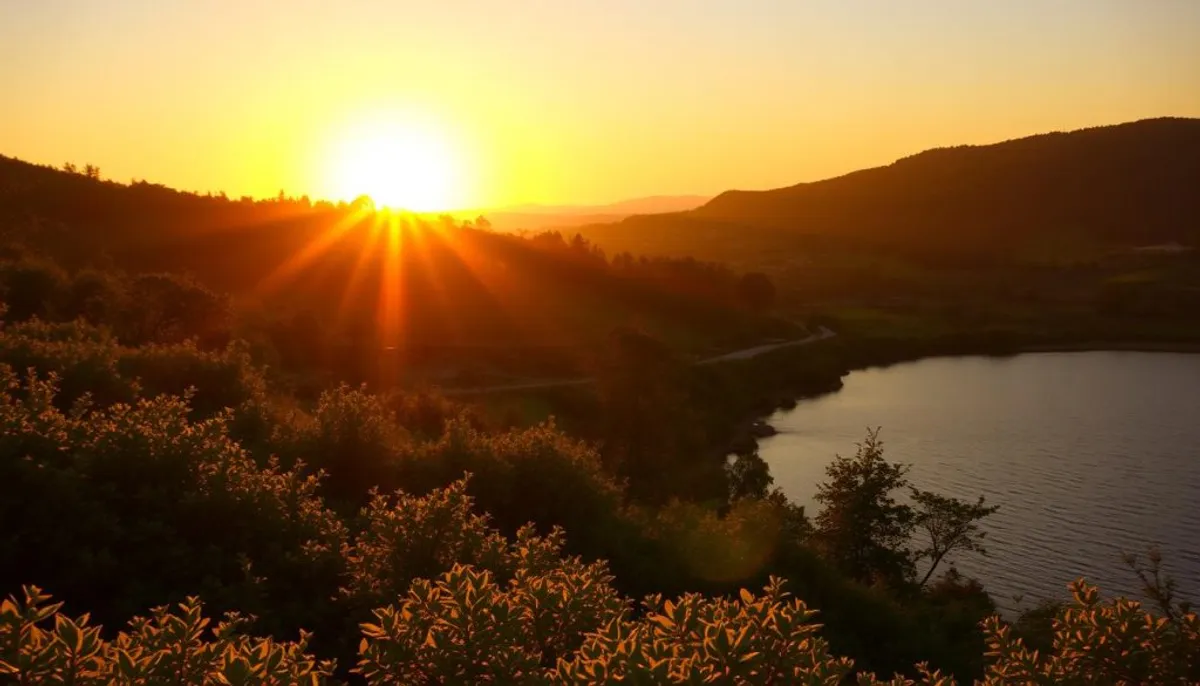
Many photographers schedule outdoor sessions around sunset to capitalize on these ideal lighting conditions. The warm tones and soft shadows can transform ordinary scenes into extraordinary photographs. This makes golden hour a favorite time for both amateur and professional photographers.
Planning is crucial for successful golden hour photography. Apps like Photo Ephemeris and PhotoPills help determine exact timing for your location. The duration varies based on geographical position and time of year.
Proper preparation ensures you’re ready to capture that perfect shot. Arriving early allows time to scout locations and set up equipment. This maximizes your chances of creating stunning images during the brief golden hour window.
Key Takeaways
- Golden hour occurs shortly after sunrise and before sunset
- It provides warm, soft light ideal for various photography genres
- Planning is crucial due to the short duration of golden hour
- Apps can help determine exact golden hour timing
- Golden hour enhances colors and softens shadows
- It’s popular for both portrait and landscape photography
Understanding the Golden Hour
The golden hour is a photographer’s treasure trove. It provides a fleeting chance to capture extraordinary images with unparalleled natural lighting. This brief period infuses scenes with warm hues and gentle illumination, crafting an otherworldly ambiance.
This ephemeral moment elevates photographs, transforming ordinary scenes into captivating visual narratives. The golden hour’s unique qualities make it an indispensable tool in a photographer’s arsenal.
What is the golden hour?
The golden hour occurs just after sunrise or before sunset. During this time, sunlight traverses more atmosphere, scattering blue light. This phenomenon allows warmer colors to dominate, resulting in a mesmerizing golden glow.
When does golden hour occur?
Golden hour graces us twice daily, at dawn and dusk. Its precise timing fluctuates based on location and season. It typically begins when the sun sits 6 degrees above the horizon.
This enchanting period concludes as the sun dips 6 degrees below. Golden hour’s duration ranges from 20 to 40 minutes, rarely extending to a full hour.
Why is golden hour important for photography?
Photographers revere the golden hour for its exceptional lighting conditions. Soft, diffused light minimizes harsh shadows and bathes subjects in a flattering glow. Warm tones infuse landscapes with depth and dimension.
The sun’s low angle creates long, dramatic shadows. These elements converge to form an ideal environment for capturing awe-inspiring images across various photographic genres.
| Golden Hour Characteristics | Benefits for Photography |
|---|---|
| Soft, diffused light | Minimizes harsh shadows |
| Warm color temperature | Creates a golden glow |
| Low sun angle | Produces long, dramatic shadows |
| Reduced contrast | Easier exposure control |
The Science Behind Golden Hour Light
Golden hour light transforms ordinary scenes into breathtaking images. This phenomenon occurs twice daily, shortly after sunrise and before sunset. The sun sits low on the horizon during these periods, typically between 6 degrees below and 6 degrees above.
The sun’s position affects light uniquely during golden hour. Sunlight travels through more atmosphere, scattering shorter blue wavelengths. Longer red, orange, and yellow wavelengths remain, resulting in warm tones and soft lighting. The color temperature averages around 3,500 K, compared to 5,500 K at midday.
Golden hour’s duration varies based on location and season. In New York, it lasts about an hour in March. Oslo experiences longer golden hours, stretching over 90 minutes. Near the poles, this magical light can persist for weeks around the equinoxes.
Photographers prize golden hour for its exceptional qualities. The warm, gentle light enhances subjects’ appearances, creating flattering portraits. Reduced contrast results in fewer dark shadows and overexposed highlights. This natural lighting phenomenon enriches scenes with inviting golden hues.
Essential Gear for Golden Hour Photography
Capturing golden hour’s magic demands specific camera equipment, lenses, and accessories. The right gear can elevate your shots to stunning masterpieces. Let’s delve into the must-have items for extraordinary golden hour photography.
Camera Equipment
Select a camera with exceptional low-light performance for golden hour photography. Opt for models boasting higher megapixels and larger sensors. These features are vital for capturing intricate details during scarce light conditions.
Lenses for Golden Hour Shots
Wide-angle lenses excel in golden hour landscapes. A focal length between 16mm and 35mm captures expansive scenes and dramatic skies. Fast lenses with f/2.8 aperture or wider ensure sharp images in dim lighting.
Accessories to Enhance Your Photos
A robust tripod is crucial for crisp golden hour shots, especially with slower shutter speeds. Consider a lightweight travel tripod for easy portability. Other beneficial accessories can significantly improve your photography experience.
These include remote shutter releases to minimize camera shake and ND filters for creative long exposures. Circular polarizer filters reduce glare on reflective surfaces. Don’t forget extra batteries and memory cards for extended shooting sessions.
| Equipment Type | Recommended Features | Benefits |
|---|---|---|
| Camera | High megapixels, large sensor | Better detail, improved low-light performance |
| Lenses | 16-35mm, f/2.8 or wider | Capture wide scenes, perform well in low light |
| Tripod | Sturdy, lightweight | Ensures sharp images, easy to carry |
Armed with this essential gear, you’re poised to capture breathtaking golden hour photos. Mastering this magical time requires consistent practice and unbridled creativity. Embrace the challenge and watch your skills flourish.
Planning Your Golden Hour Shoot
Golden hour photography demands meticulous planning. This magical window occurs during the first hour post-sunrise and the last hour pre-sunset. It offers a brief period of soft, warm light for captivating outdoor portraits and landscapes.
Scout your location beforehand, considering the sun’s position and potential obstructions. Utilize apps like “Rise” for iOS to determine precise golden hour times. This free tool provides accurate sunrise and sunset information, even in areas lacking cell service.
Arrive early to set up equipment and prepare subjects. Timing varies seasonally; winter sessions might start at 3:00 PM, while summer shoots often begin around 7:00 PM. Be ready to work swiftly, as optimal lighting conditions may be fleeting.
- Check weather forecasts
- Adjust white balance settings
- Use wide apertures
- Select low ISO settings
With thorough preparation, you’ll be poised to capture the enchanting essence of golden hour. Your outdoor portraits and landscape photography will benefit from this extraordinary light phenomenon.
Techniques for Capturing Golden Hour Portraits
Golden hour provides a magical atmosphere for outdoor portraits. This fleeting period bathes everything in warm, soft light. Mastering key techniques will elevate your photography during this enchanting time.
Backlighting Subjects
Backlighting creates a stunning effect during golden hour. Position your subject with the sun behind them for a beautiful halo effect. This technique softens facial features and adds a dreamy quality to portraits.
For optimal results, set your white balance to 6000K-6500K. This adjustment accurately captures the warm tones characteristic of golden hour light.
Using Reflectors for Fill Light
Backlighting can sometimes create harsh shadows. Use a reflector to bounce light onto your subject’s face. This fill light maintains detail and creates a more balanced exposure.
Experiment with different reflector colors to adjust the portrait’s mood. Gold reflectors add warmth, while silver ones provide a cooler tone.
Creating Silhouettes
Golden hour offers perfect conditions for dramatic silhouettes. Place your subject against the bright sky and expose for the background. This technique adds variety to your portfolio and creates striking, memorable images.
Use a lower aperture, like f/2.8, to maximize bokeh. This setting separates your subject from the background, enhancing the silhouette effect.
| Technique | Key Settings | Effect |
|---|---|---|
| Backlighting | White balance: 6000K-6500K | Soft glow, dreamy effect |
| Fill Light | Reflector use | Balanced exposure, detail preservation |
| Silhouettes | Aperture: f/2.8 or lower | Dramatic contrast, creative variety |
Golden hour lasts approximately one hour, necessitating careful planning. Arrive early to scout locations and set up your equipment. These techniques will help you capture stunning portraits that showcase golden hour’s magic.
Landscape Photography During Golden Hour
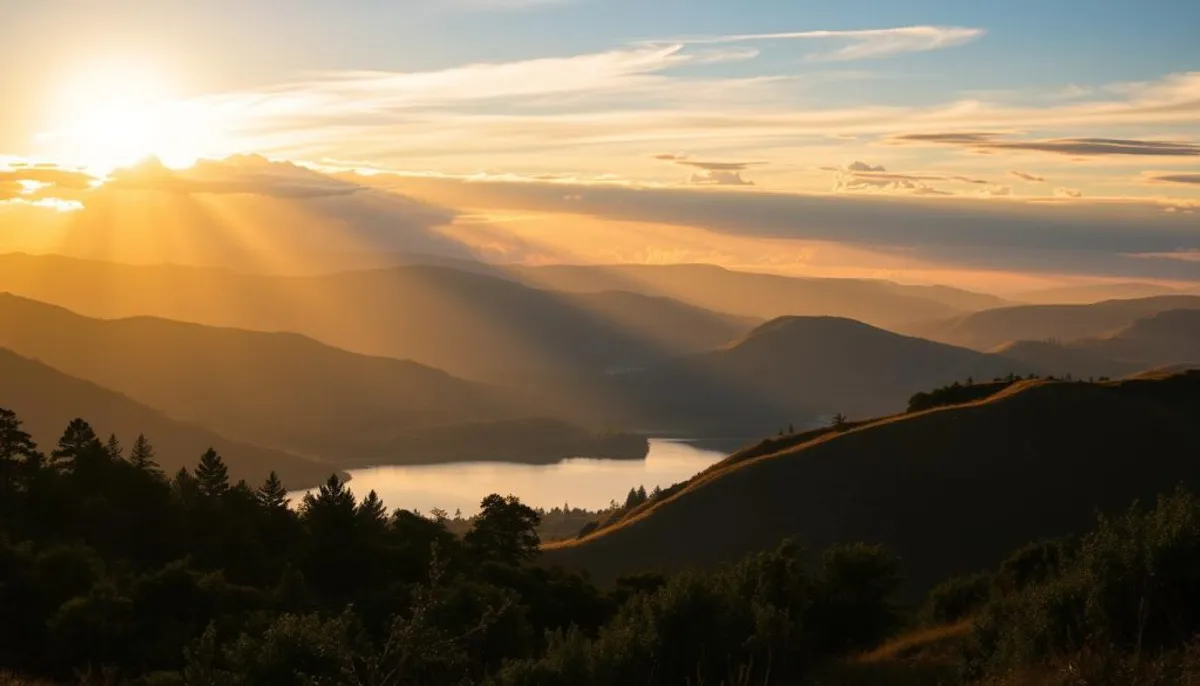
Golden hour bathes landscapes in enchanting warm light, creating mesmerizing scenes. This fleeting period, lasting about an hour, offers photographers unique opportunities and challenges. The sun’s low angle casts long shadows, adding depth and texture to images.
Dusk’s soft, diffused light enhances colors and reduces contrast. This makes capturing balanced exposures easier. The warm evening light brings out details often missed in harsh daylight.
To make the most of golden hour landscape photography:
- Scout locations in advance
- Use a tripod for stability in low light
- Experiment with different focal lengths
- Consider using filters to balance exposure
Clouds play a crucial role in golden hour shots. They add drama and color to the sky, reflecting warm sunset tones. Partly cloudy conditions can create breathtaking scenes with sunbeams piercing through cloud gaps.
Timing is critical in golden hour photography. The landscape transforms rapidly as the sun approaches the horizon. Be ready to work swiftly and adjust your composition with changing light.
With dedication and patience, you’ll capture stunning images showcasing golden hour’s beauty. Practice honing your skills to master this magical time for landscape photography.
Golden Hour
Golden hour enchants photographers twice daily. It occurs just after sunrise and before sunset. The sun’s low angle produces soft, warm light. This unique illumination elevates the quality of photographs significantly.
Characteristics of golden hour light
Golden hour light possesses distinctive qualities for exceptional photography. Sunlight traverses more atmosphere, yielding warm tones and gentle shadows. This natural lighting bestows a dreamy, flattering effect on subjects.
Advantages of shooting during golden hour
Photographers cherish golden hour for its myriad benefits. Soft light diminishes harsh contrasts, simplifying exposure management. Colors appear more vivid and intense. Long shadows enhance depth and texture in landscapes.
For portraits, the warm glow creates a stunning effect on skin tones. This natural radiance produces captivating and flattering images.
Challenges of golden hour photography
Golden hour presents both opportunities and obstacles. The rapidly changing light demands swift action from photographers. Low sun angles can introduce lens flare issues.
Timing and quality of golden hour light fluctuate based on location and season. Weather conditions also impact the golden hour experience. Meticulous planning is crucial for capturing the perfect shot.
Mastering Exposure in Golden Hour Conditions
Golden hour presents photographers with a unique opportunity for capturing stunning images. This magical time bathes subjects in warm, soft light. Achieving perfect exposure during golden hour demands understanding camera settings and specific techniques.
For optimal exposure, employ spot or partial metering. These methods ensure accurate exposure for the scene’s most crucial elements. When dealing with backlighting, expose for highlights to prevent overexposed areas. Fine-tune your shots using exposure compensation.
Bracketing exposures proves invaluable in high-contrast scenes. This method involves capturing multiple shots at varying exposure levels. Shooting in RAW format preserves more detail in highlights and shadows. This approach offers greater flexibility during post-processing.
| Exposure Technique | Benefits | Best For |
|---|---|---|
| Spot Metering | Precise exposure for specific areas | Portraits, wildlife |
| Exposure Compensation | Fine-tuning exposure | Backlit scenes, landscapes |
| Bracketing | Captures range of exposures | High-contrast scenes |
| RAW Format | Retains more detail | All golden hour photography |
Golden hour occurs approximately one hour after sunrise and before sunset. Utilize apps like Golden Hour Calculator for precise shoot planning. Through consistent practice, you’ll master exposure techniques. This dedication will enable you to create awe-inspiring golden hour masterpieces.
Composition Techniques for Golden Hour Shots
Mastering composition techniques elevates golden hour photos. These effective photography tips will enhance your images during this magical time. Explore strategies to capture stunning visuals in the warm, soft light.
Rule of thirds
The rule of thirds brings balance to golden hour shots. Divide your frame into a 3×3 grid mentally. Position key elements along these lines or at their intersections. This approach makes sunset or sunrise images more visually engaging.
Leading lines
Leading lines guide viewers through golden hour photos. Seek natural paths, rivers, or shadows cast by the low sun. These lines create depth and interest in your compositions. Long shadows during golden hour form striking leading lines, adding drama.
Framing with natural elements
Frame subjects with natural elements to enhance golden hour shots. Tree branches, rock formations, or architectural features add depth and context. This technique highlights your main subject and showcases the characteristic warm light.
Plan ahead for this fleeting period. Be prepared to capture that perfect shot. Every second counts during the golden hour.
RelatedRelated articles
- 18 Oct 2024·7 min readBreathtaking Sunsets: Nature’s Evening SpectacleGeneral
 Nature stages a spectacular show as daylight fades. The sky transforms into a vibrant canvas, heralding nightfall’s approach. This daily phenomenon, the sunset, mesmerizes global audiences with its stunning display.Sundown evokes a range of emotions ...